To correctly use an air mattress for bedsores, you must avoid the setup errors that render the equipment useless. A kinked hose, improper pressure, or tightly tucked sheets turn a therapeutic surface into a liability, concentrating pressure instead of relieving it and causing the very skin breakdown you are trying to prevent.
This guide provides a clear standard operating procedure for clinical staff. We detail the correct hand-check method to set pump pressure, explain how to avoid the “hammock effect” with proper sheet placement, and outline routine checks for air leaks to ensure the mattress delivers consistent, effective pressure relief.
Understanding the Role of Alternating Pressure Air Mattresses

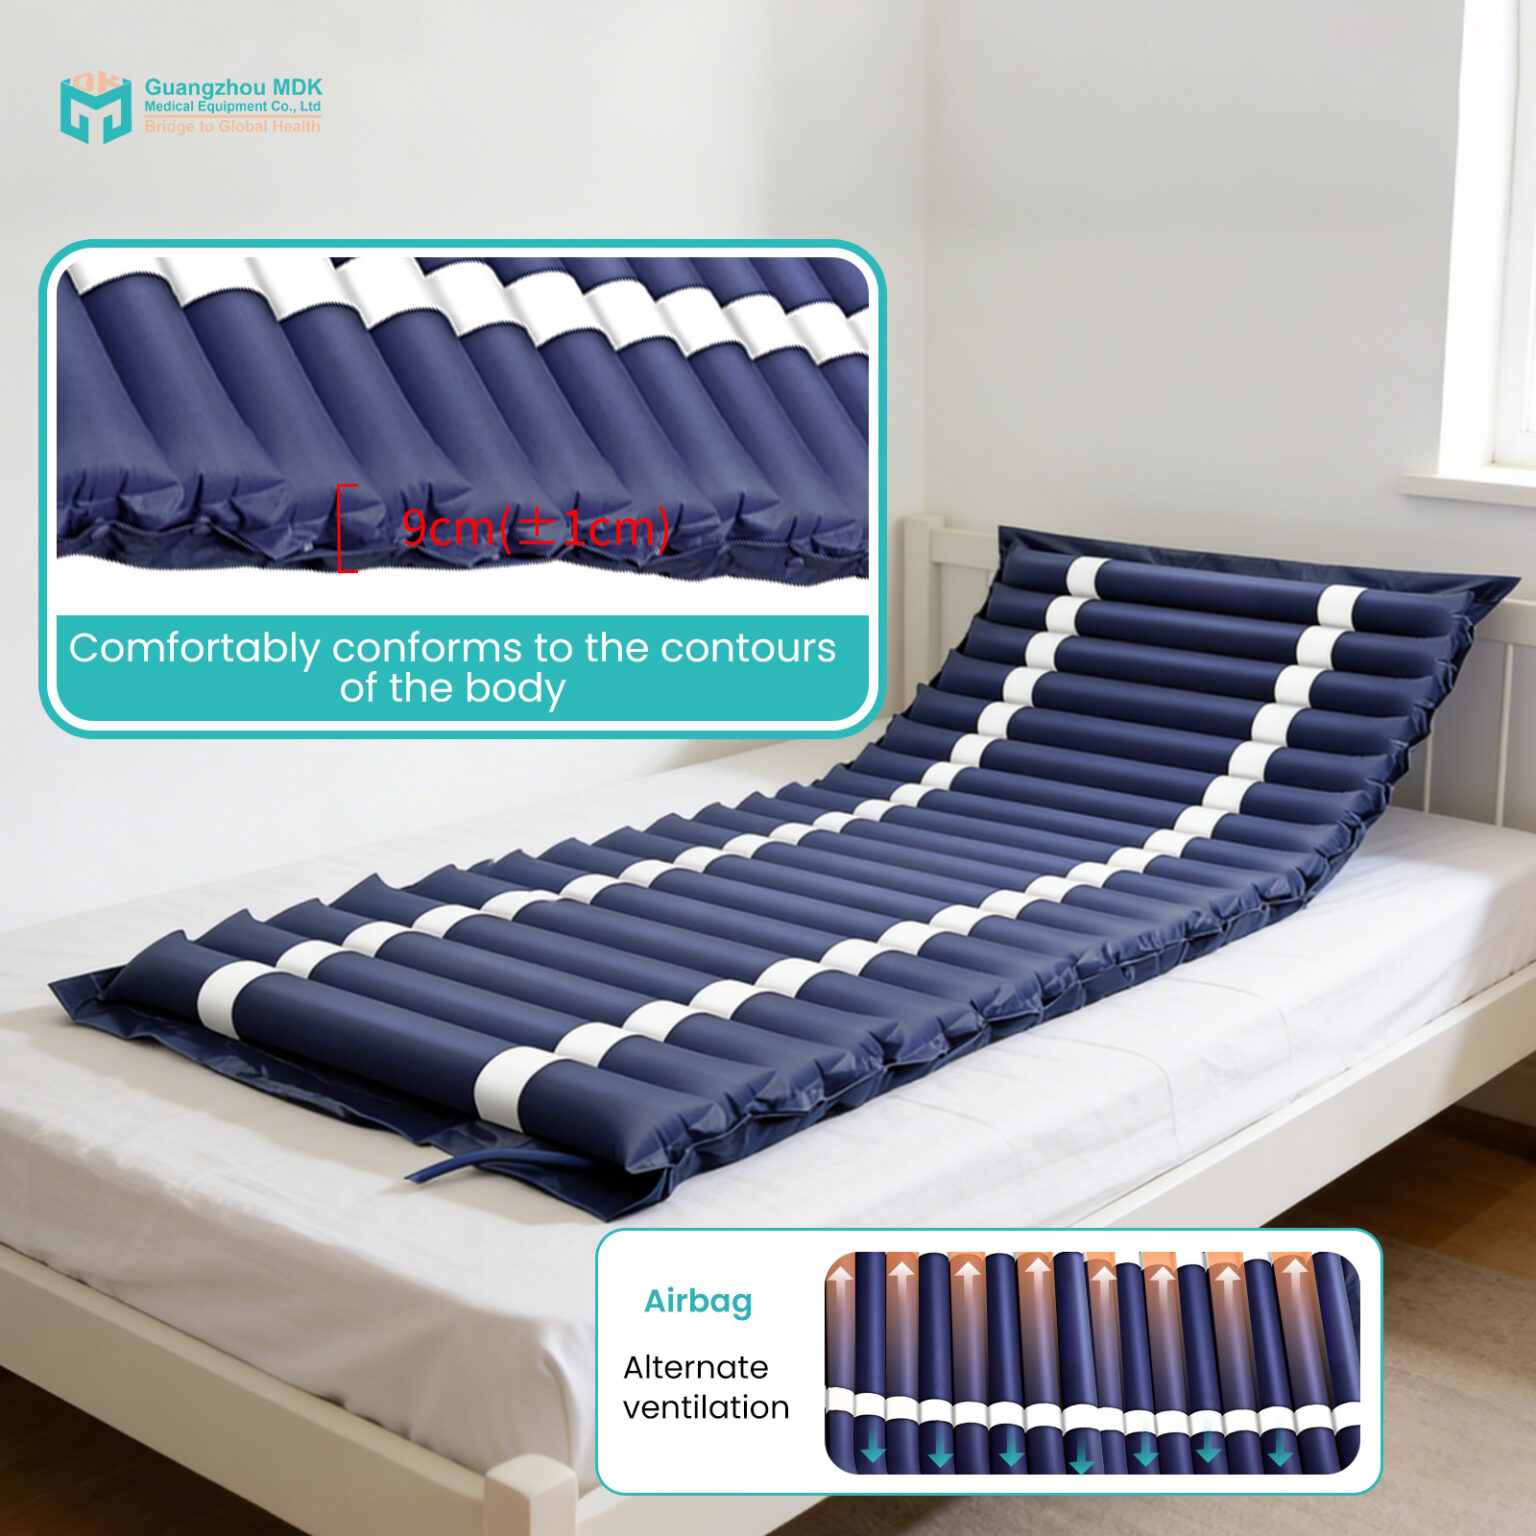
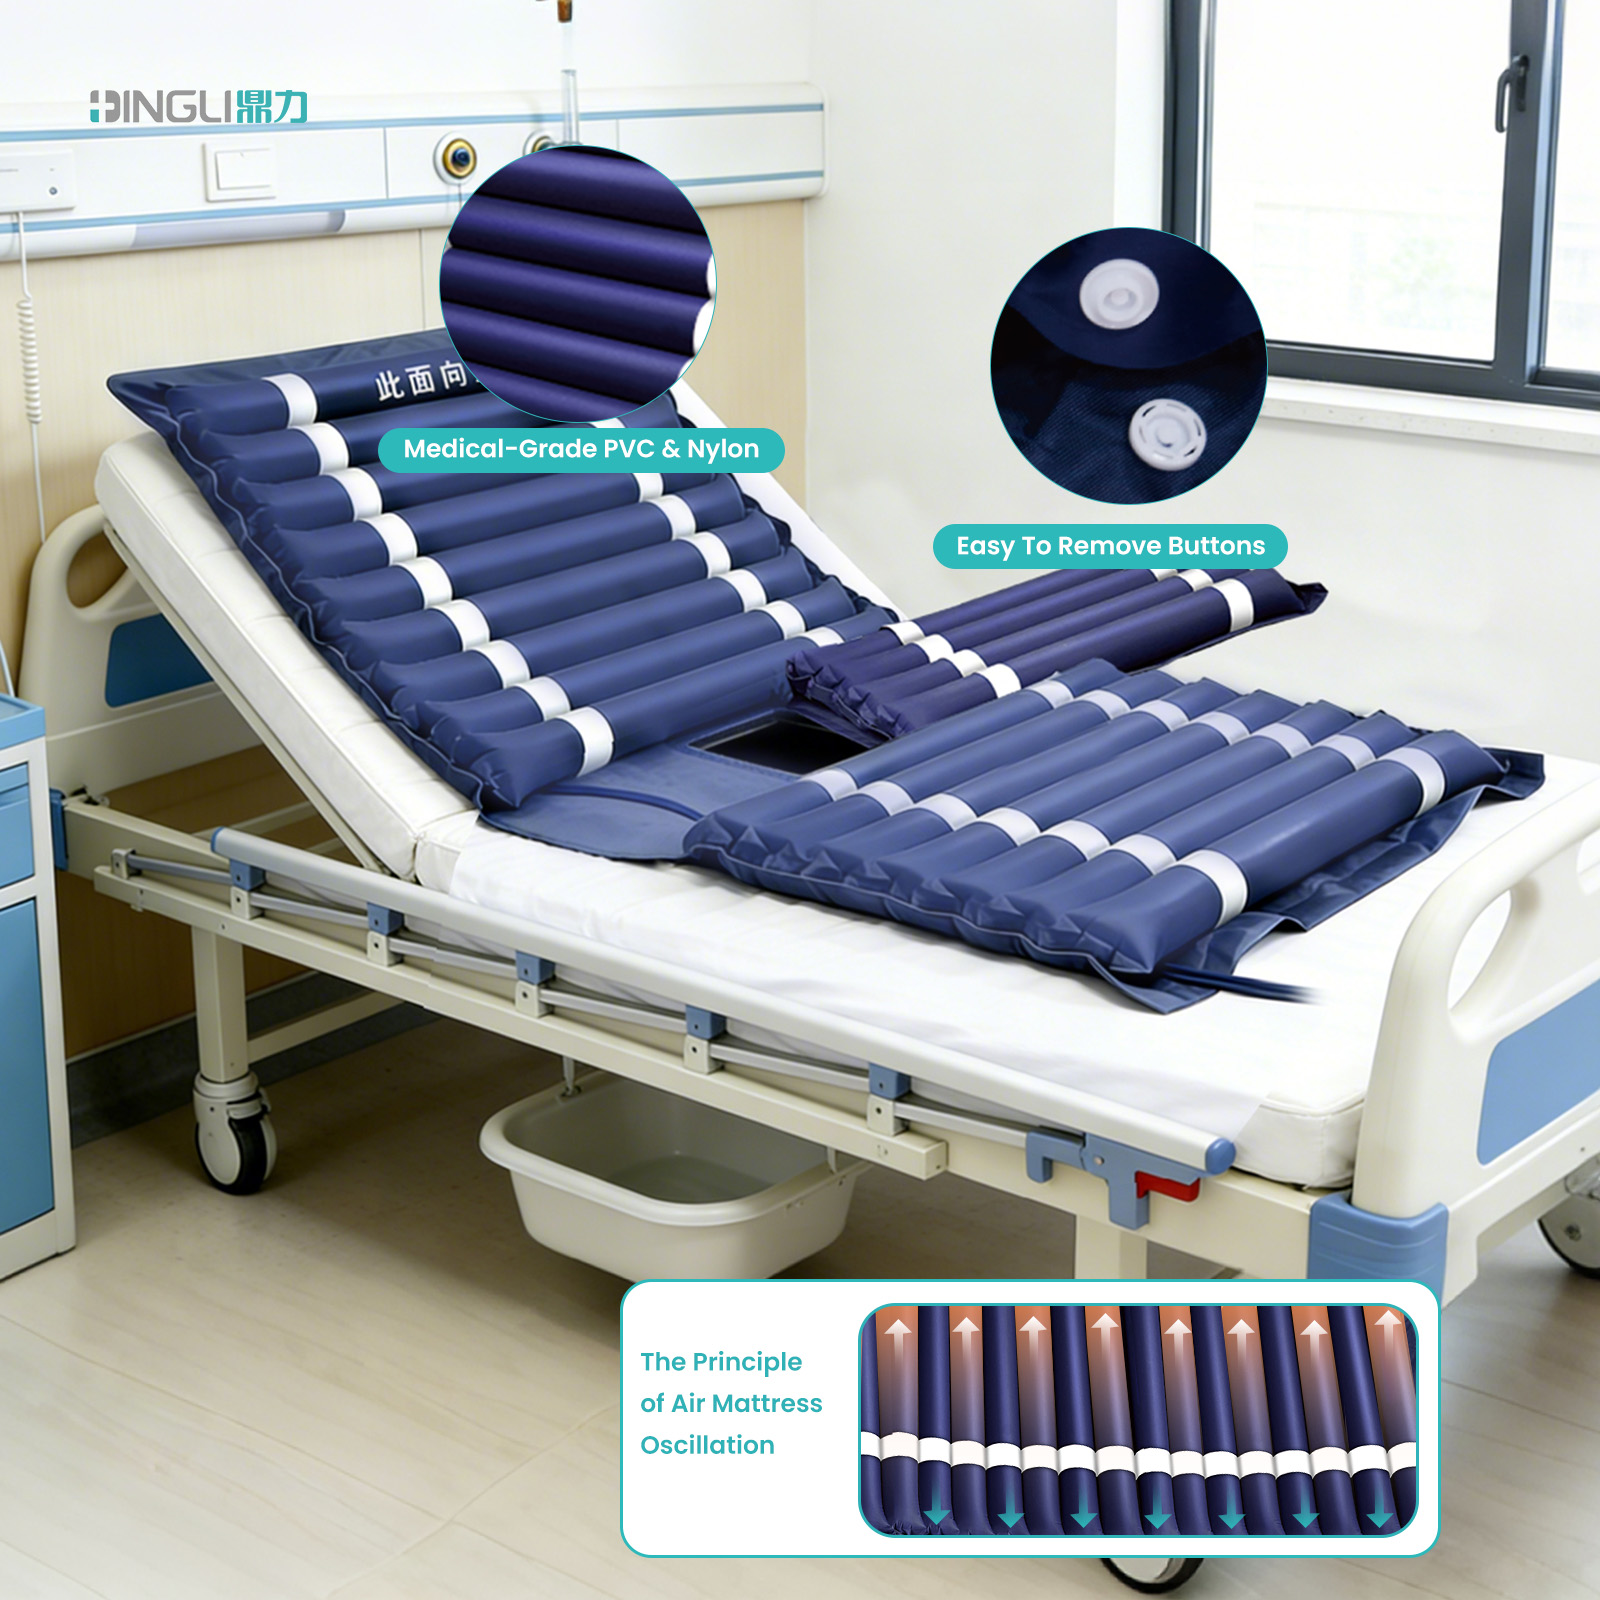
These mattresses prevent bedsores by cyclically inflating and deflating air cells. This process constantly shifts pressure points, ensuring no single skin area endures prolonged pressure and maintaining blood flow.
How Alternating Pressure Prevents and Manages Bedsores
Bedsores, or pressure ulcers, develop when sustained pressure on the skin, especially over bony areas like the hips and tailbone, cuts off blood supply. Without blood flow, tissue dies. An alternating pressure mattress directly counters this by never letting pressure settle in one spot for too long.
The system uses a series of air cells arranged in rows, which a pump inflates and deflates in a continuous cycle, typically every 5 to 10 minutes. While one set of cells is firm and supporting the body, the adjacent set becomes softer, relieving pressure on the skin above it. This constant shifting ensures that every part of the body gets regular periods of pressure relief, allowing blood to flow back into the capillaries and keep the tissue healthy.
System Types and Their Place in Patient Care
Not all alternating pressure systems are the same. They generally fall into two categories, each with a specific role in patient care settings like home care, hospice, or long-term facilities.
Alternating Pressure Overlays are thinner air-filled pads placed on top of an existing mattress. These are typically used as a preventative measure for patients at moderate risk of developing bedsores or for treating early-stage ulcers. Because they are more portable and less expensive, overlays are a practical solution for home care and facilities looking for a cost-effective way to upgrade a standard bed.
Full Replacement Alternating Pressure Mattresses are complete, integrated systems that replace the standard mattress entirely. These are reserved for patients at high or very high risk, or for those who already have established, severe pressure ulcers. They provide more comprehensive pressure relief and often come with advanced features like integrated low-air-loss and zoned pressure controls for targeted therapy. These are the standard for intensive care situations where maximum skin protection is non-negotiable.
Connecting Air Hoses to Avoiding Kinking
A kinked air hose renders a pressure-relief mattress useless. Proper routing isn’t optional—it’s critical for maintaining therapeutic airflow and preventing sores.
Proper Hose Connection and Routing Techniques
The process starts before you even connect the hoses. First, secure the mattress to the bed frame so it can’t shift and pull on the tubing. Once the mattress is stable, route the hoses along the shortest practical path that avoids sharp edges, moving bed parts like rails or lift motors, and foot traffic. Where the hose needs to turn, use large, gentle curves instead of sharp 90-degree bends. Finally, connect the hoses firmly to the correct ports on both the pump and mattress. Push until they click or seat fully. A loose connection is more likely to bend and create a kink.
Ongoing Monitoring for Kinks and Obstructions
You have to keep an eye on the hoses. Visually inspect the entire line from pump to mattress at the start of every shift and after any patient repositioning or bed adjustment. Pay attention to pump alarms for pressure changes or mattress sections that fail to inflate, as these are direct signs of a blockage. Check common trap points—make sure hoses aren’t pinched between the bed frame and side rails, trapped under wheels, or crushed by a nearby chair. If you find a kink, don’t just straighten it. Reroute the hose to fix the underlying problem so it doesn’t happen again.
Your Certified, Factory-Direct Medical Supply Partner
Operating the Compressor Pump: Finding the Ideal Pressure
The right pump pressure isn’t a single number. It’s the lowest setting that prevents “bottoming out,” confirmed with a simple hand check under the patient’s hips.
| Initial Setup and the Hand-Check Method | Fine-Tuning Pressure for Patient Needs and Positions |
|---|---|
|
|
Proper Sheet Placement to maintain Cell Breathability
Using the wrong sheets or tucking them in tightly negates the pressure-redistribution benefit of the mattress. Bedding must be loose, breathable, and kept clear of all mattress equipment.
Preventing the Hammock Effect and Airway Obstruction
How you place the sheets is just as important as the mattress itself. A few common mistakes can completely undermine the system’s effectiveness. The main goal is to let the air cells move freely.
- Avoid stretching sheets tightly across the mattress. This creates a “hammock effect,” which holds the patient up and prevents the air cells from properly off-loading pressure.
- Do not tuck sheets in. Tightly tucked bedding compresses the surface and stops the air cells from inflating and deflating correctly, which is the entire point of the mattress.
- Make sure bedding doesn’t block or pinch air hoses, control panels, or emergency CPR valves. Obstructed equipment can interfere with the mattress function or become a safety issue.
Using Loose, Breathable Sheets to Preserve Cell Movement
The right type of bedding allows the mattress to do its job without interference. Think minimal, loose, and breathable.
- Choose thin, breathable sheets. A 4-way stretch fabric is ideal because it moves with the mattress surface instead of restricting the air cells.
- Drape the sheet loosely and keep the surface as smooth as possible. Wrinkles and bunching can create small but significant pressure points on the skin.
- Use the fewest layers of bedding possible. Piling on pads and blankets traps heat and moisture, which significantly increases the risk of skin breakdown.
Monitoring Alternating Cycles and Detecting Leaks
An alternating pressure mattress is only effective if its cycles run correctly and there are no air leaks. Regular checks are non-negotiable for preventing pressure sores.
Confirming Proper Cycle Operation
An alternating pressure mattress works by cyclically inflating and deflating different sets of air cells, typically every 6 to 12 minutes. This constant shifting of pressure is what prevents tissue damage. If the cycle isn’t running correctly, the mattress becomes a simple static surface and loses its primary therapeutic benefit. You need to confirm the system is performing as intended.
Also, be mindful of the “static mode.” This feature inflates all cells to a uniform pressure, which is useful for patient transfers or providing care. But if you forget to switch the pump back to “alternating mode,” the patient is left on a static surface, increasing their risk for pressure sores.
Identifying and Locating Air Leaks
An air leak compromises the entire system. It prevents the mattress from reaching the required pressure, which can lead to “bottoming out”—where the patient’s body sinks through the mattress and rests on the hard bed frame. This concentrates pressure instead of relieving it.
Watch for these common signs of a leak:
- The mattress feels noticeably soft or underinflated, even with the pump set correctly.
- The pump’s low-pressure alarm light is on or blinking continuously.
- The alternating cycle feels weak or non-existent, with little difference in firmness between cell sets.
If you suspect a leak, you need to locate it. Start with a systematic inspection. First, trace the tubing from the pump to the mattress, checking for kinks, cracks, or loose connections. Make sure every connector is fully seated. Próximo, run your hands over the mattress surface and along the seams, feeling for escaping air. Pay close attention to the cells in the sacral area, as they are under the most stress. If you find a row that never gets firm during the cycle, the leak is likely in one of those cells. If the mattress is compromised and cannot be immediately repaired, move the patient to a reliable support surface and contact your equipment provider for service.
Critical Mistakes that Compromise Pressure Sore Prevention
An air mattress is just a tool. Its effectiveness in preventing pressure sores is often compromised by simple, recurring errors in daily use and overall care planning.
Errors in Daily Use and Patient Interaction
Even with the right equipment, day-to-day mistakes at the bedside can completely negate the benefits of a pressure-relief mattress.
- Relying on the mattress alone. The biggest mistake is treating the mattress as a substitute for manual repositioning. Best practice still demands a strict turning schedule, usually every two hours, for immobile patients.
- Incorrectly inflating the mattress. Setting the pressure too high makes the surface too firm, creating pressure points. Setting it too low allows the patient to “bottom out,” pressing their bony prominences against the hard bed frame.
- Using excess bedding. Thick pads, toppers, or multiple blankets create a “hammock” effect that prevents the air cells from doing their job. These layers block airflow, trap moisture, and stop the mattress from redistributing pressure effectively.
- Ignoring shear and friction. Dragging a patient across the bed instead of using a draw sheet, or raising the head of the bed too high causing them to slide down, creates shear forces that tear at underlying tissue.
Systemic Flaws in Planning and Maintenance
Beyond the bedside, failures in the initial planning and ongoing upkeep of the equipment create huge vulnerabilities. These systemic issues set caregivers up to fail before they even start.
- Selecting the wrong type of mattress. Using a basic, non-medical air mattress for a high-risk patient is a recipe for disaster. The support surface must be matched to the patient’s specific risk level and clinical status.
- Failing to create a complete care plan. The mattress is only one piece of the puzzle. It must be part of a holistic plan that includes nutritional support, hydration goals, and routine skin assessments.
- Neglecting routine maintenance. A mattress with a failing pump, kinked hose, or leaky air cells is no longer a therapeutic surface. Regular functional checks are non-negotiable.
Cleaning Protocols for Medical-grade TPU and PVC Air Surfaces
Properly cleaning medical air mattresses isn’t just about wiping them down. It’s about following a strict process to ensure patient safety and avoid damaging the equipment.
Core Cleaning and Disinfection Process
Start by powering off the entire mattress system. Strip off all linens and get rid of any visible debris. This isn’t just tidying up; it’s the first step to prevent cross-contamination.
Próximo, clean the entire surface. Use a soft, non-abrasive wipe with a detergent or neutral cleaner. The goal is to remove the physical soil first. Only after the surface is physically clean should you apply an approved hospital-grade disinfectant. Make sure the surface stays visibly wet for the full contact time listed on the product label. If you let it dry too soon, you’re not actually disinfecting anything.
Once the contact time is up, check the disinfectant’s label. If it says to wipe away residue, do it. Then let the surface air-dry completely. Don’t rush this part. Before reassembling anything, inspect all seams, valves, and tubing connections for any trapped moisture or missed contamination. The mattress system should only be put back into service after it’s confirmed to be bone-dry and has passed a functional check.
What to Use and What to Avoid
Stick to what’s approved and compatible. Using the wrong chemical can degrade the mattress material, making it unsafe and harder to clean in the future.
- Approved Disinfectants: Use products like quaternary ammonium compounds (quats), hydrogen peroxide, or specific chlorine-based solutions, but only if they are explicitly approved by the mattress manufacturer. Compatibility is key.
- For Tough Organisms: If you’re dealing with spore-forming bacteria like C. difficile, a standard disinfectant won’t cut it. You must use a dedicated sporicidal disinfectant *after* the initial cleaning step.
Knowing what to avoid is just as critical. Common mistakes here can permanently damage the equipment or create safety hazards.
- No Abrasives: Stay away from abrasive pads, scouring powders, or rough brushes. They will scratch and compromise the integrity of the TPU or PVC surface.
- No Harsh Chemicals: Do not use unapproved or high-concentration bleach, harsh solvents, or phenol-based cleaners unless the manufacturer explicitly allows it. And never mix different cleaning chemicals.
- No Submersion: Never immerse the air bladders, pump housing, or any electrical components in liquid. It’s a recipe for equipment failure and an electrical hazard.
Frequently Asked Questions
How do you set up an alternating pressure pad on a hospital bed?
First, place the uninflated pad on the bed mattress with the air connection points at the foot of the bed. Tuck any extra non-inflatable material under the mattress to hold it in place. Hang the pump on the footboard, connect the air hoses securely, and plug it in. Turn the pump on and set the pressure dial to ‘firm’ for quick inflation, which usually takes about 15–20 minutes. Once inflated, cover the pad with a fitted sheet, position the patient, and adjust the pressure dial according to their weight and comfort.
Should a medical air mattress for bedsores run 24/7?
Yes. The pump for an alternating pressure mattress is designed to run continuously whenever the patient is in bed. This constant operation is what allows the mattress to cyclically inflate and deflate its air cells, which redistributes pressure and prevents bedsores. Turning the pump off stops this therapeutic action and can cause the pad to deflate, increasing risk.
What number should the bedsore air mattress pump dial be set to?
There isn’t one single number; the setting depends on the patient’s body weight. Check the pump or manual for a chart that matches weight ranges to specific dial settings. As a rule, set the dial to the lowest pressure that prevents the patient from ‘bottoming out,’ meaning they don’t sink so far that they touch the hard mattress underneath. You can check this by sliding a hand under their hips.
Can you put a mattress topper on top of a medical air mattress?
It is generally not recommended. A thick mattress topper can block the alternating pressure effect, making the mattress less effective at preventing bedsores. The system works best when only a thin fitted sheet is placed between the patient and the air cells. Using a thick topper can turn the dynamic surface into a static one, which defeats its purpose.
How long does it take for a medical ripple mattress to inflate?
Most medical ripple mattresses inflate in about 10 to 30 minutes. Smaller, bubble-style overlays are often ready in 10 to 20 minutes. Larger, full-replacement tubular systems might need 20 to 30 minutes. The mattress is ready for use once it’s firm enough to support the patient without them touching the bed base and the alternating cycle is active.
What should I do if the low-pressure warning light comes on?
A low-pressure warning means the mattress may not be providing enough support. First, check that the pump is plugged in and turned on. Then, inspect the air hoses to ensure they are securely connected to both the pump and the mattress, with no kinks or blockages. Also, look for any audible air leaks from the mattress itself. If the light stays on after these checks, the system needs service, as it may no longer be safe for preventing bedsores.
Final Thoughts
Mastering these procedures separates professional care from guesswork. While any air mattress seems like an upgrade, only medical-grade systems operated with these standards truly protect patients and your organization. This is about eliminating the clinical and financial risks of pressure injuries.
Don’t leave patient outcomes to chance with unreliable hardware. Ensure your equipment supports these best practices by reviewing our full product specifications. Contact our specialists to discuss your supply needs or OEM branding.